


Chevy Silverado Tesla Screen Installation 2019–2023: 29-Step Android Radio Guide
A photo-by-photo installation guide covering dashboard removal, original-part transfer, wiring, screen installation, AUX-to-USB audio routing, original-display setup, reverse-camera configuration and factory-panel setup for the corresponding iKAGOO vehicle-specific Android head unit.
This guide is intended only for the corresponding screen, fascia, wiring harness and vehicle interface supplied by iKAGOO for the vehicle configuration confirmed with the order.
A similar-looking third-party unit may use different pinouts, CAN hardware, firmware, audio routing or factory-screen settings.
If the connector, fascia, original screen or supplied harness does not match your vehicle, stop installation and contact iKAGOO before modifying anything.
iKAGOO is not responsible for damage caused by third-party products, non-iKAGOO wiring, forced or incorrect connections, wire cutting, connector modification or installation performed against the supplied configuration. Version-specific technical support requires a valid iKAGOO order number.
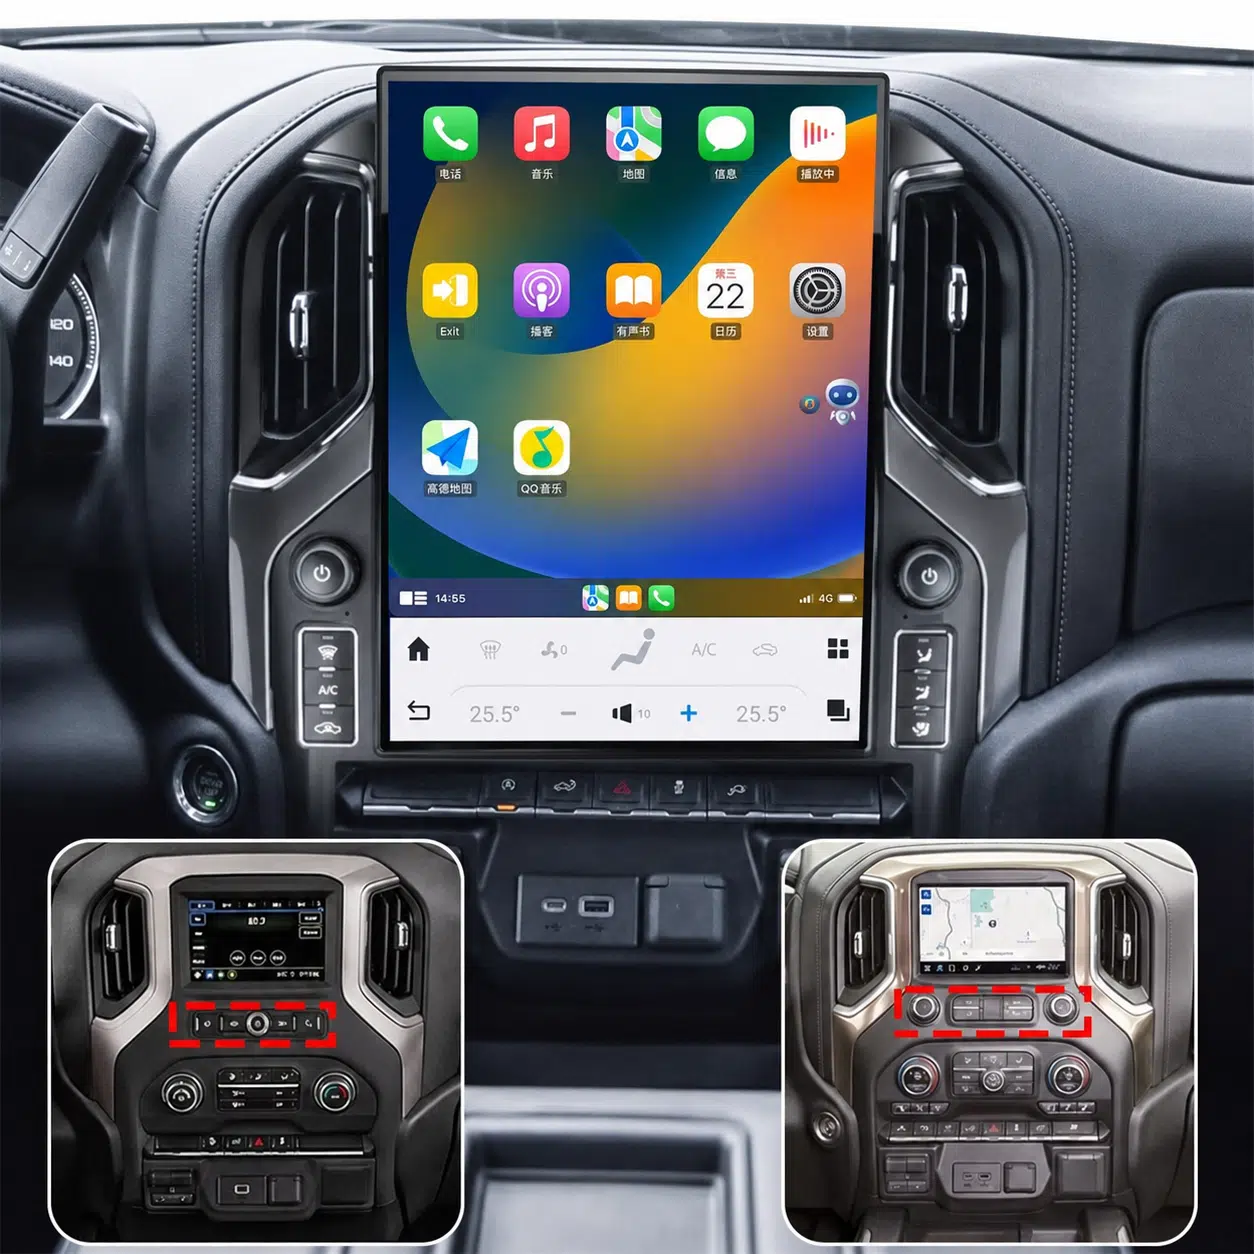
What does this installation actually involve?
The job is not a simple screen swap. The factory center stack is removed in stages, several original modules are transferred into the new fascia, the original connectors are reconnected through the matched wiring route, and the screen is tested before the dashboard is closed.
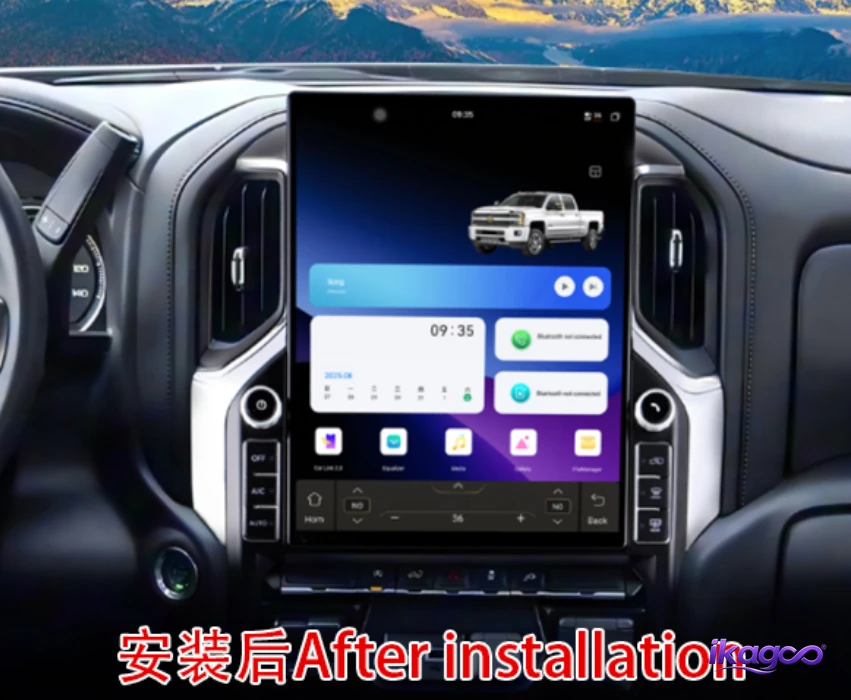
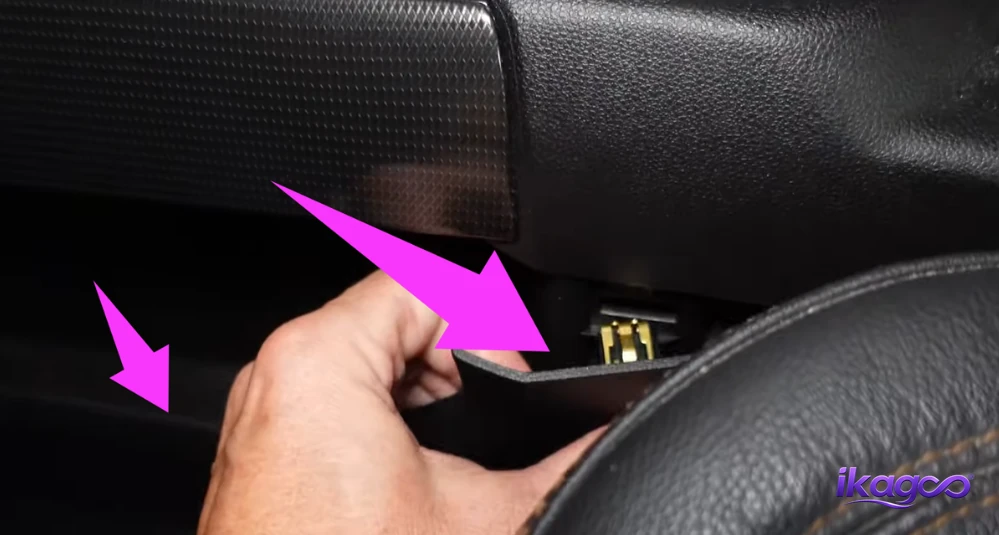
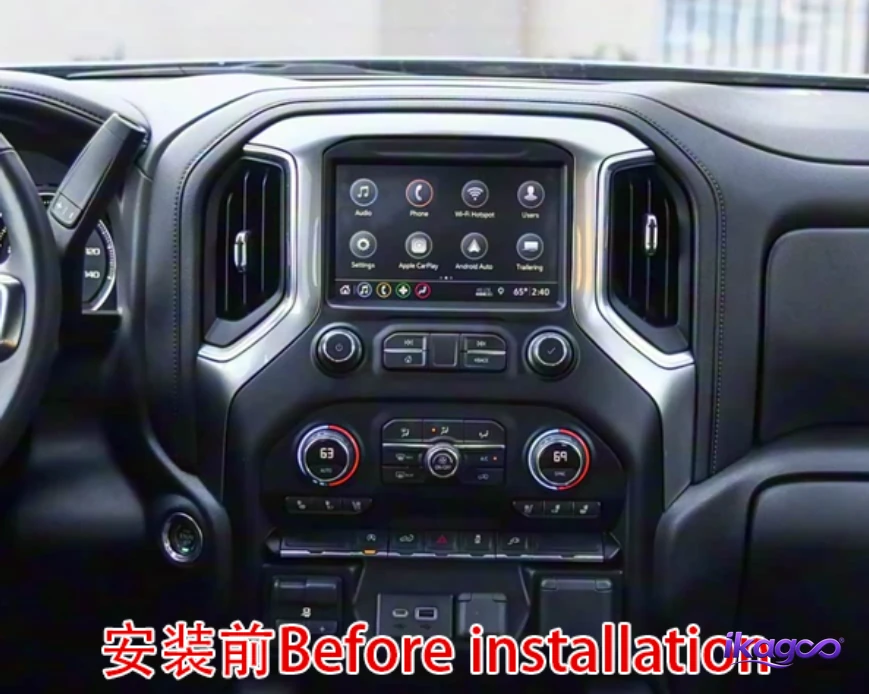
Steps 1–11: remove the original Silverado center stack
Follow the order. Do not jump directly to the screen or pull the complete center panel before its surrounding trim and connectors are released.
Remove the screw caps and fastening screws
Start with the fasteners securing the trim panels on both sides of the dashboard.
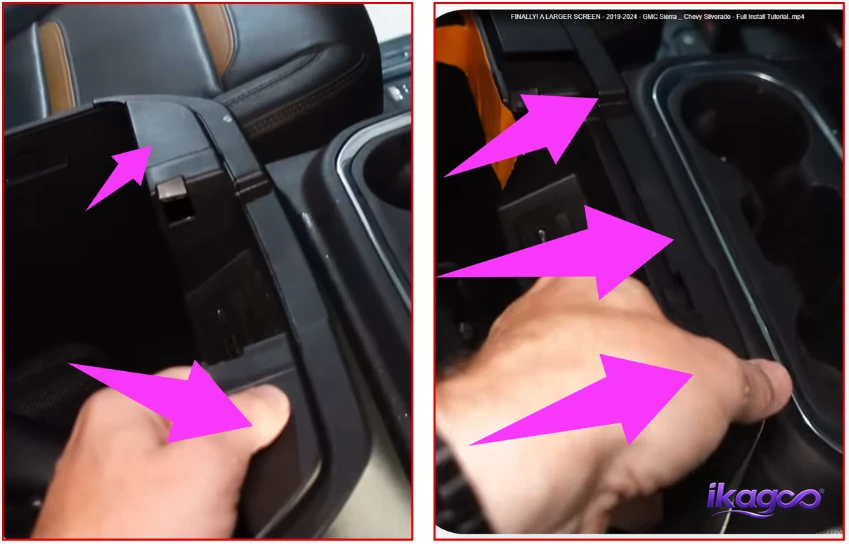
Release the left and right trim panels
The trim is retained by clips after the screws are removed.
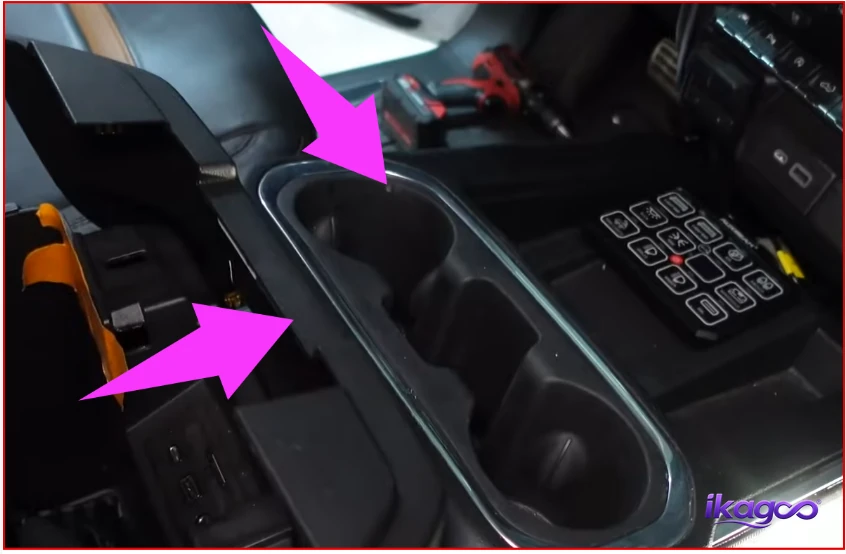
Lift the front center-console trim upward
The reference sequence lifts this panel upward to release it from the console.
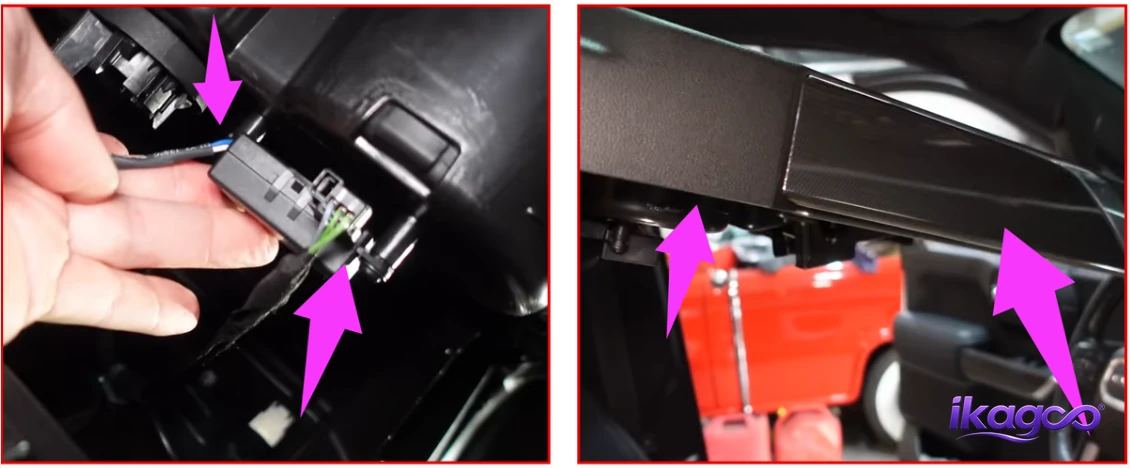
Disconnect the center-console connector
Do not move the removed trim away until its electrical connection has been released.
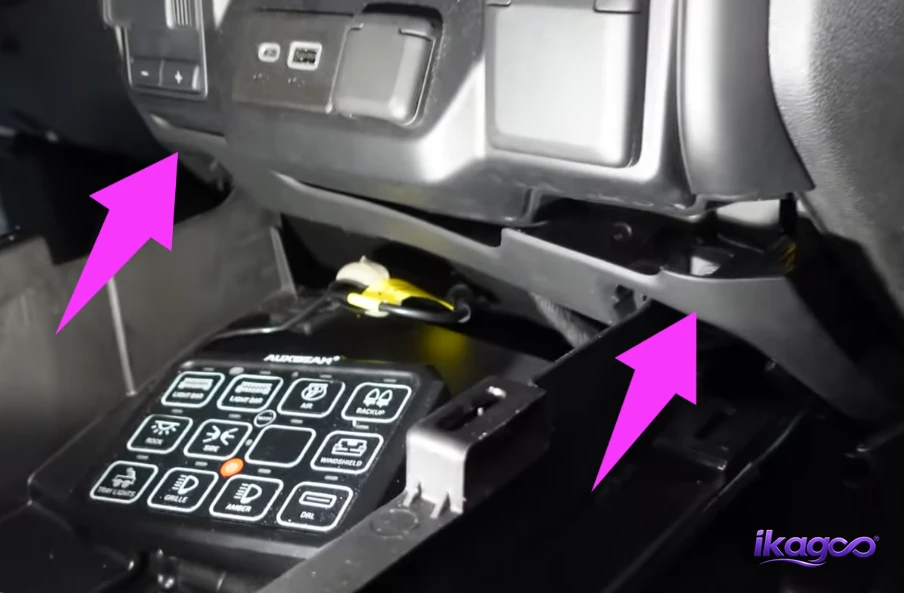
Remove the trim at the bottom of the center console
This lower trim covers the next section of the center-stack assembly.
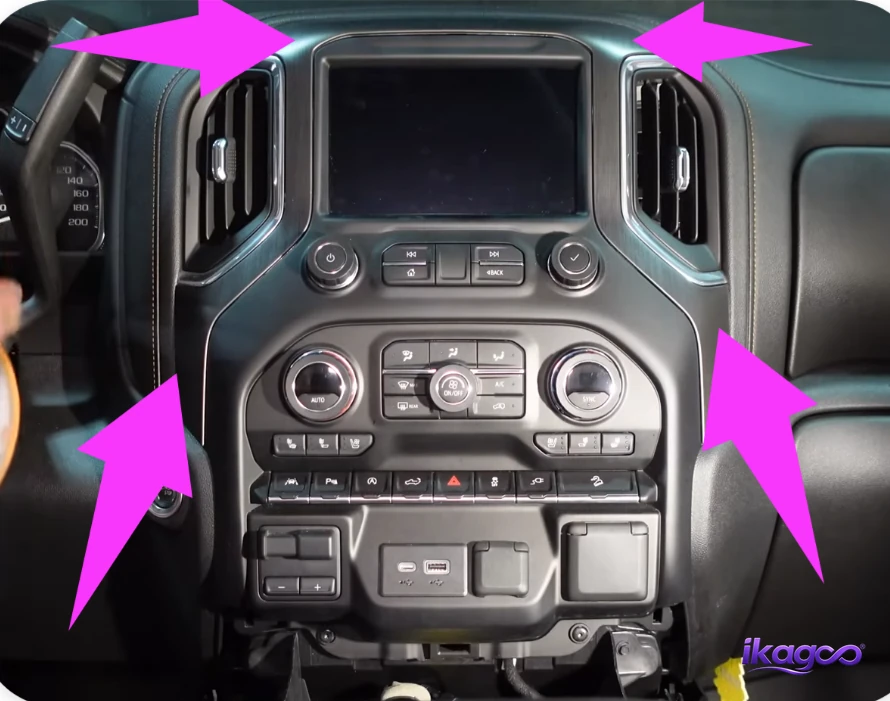
Remove the center-console trim panel
With the surrounding pieces already removed, release the main center trim.
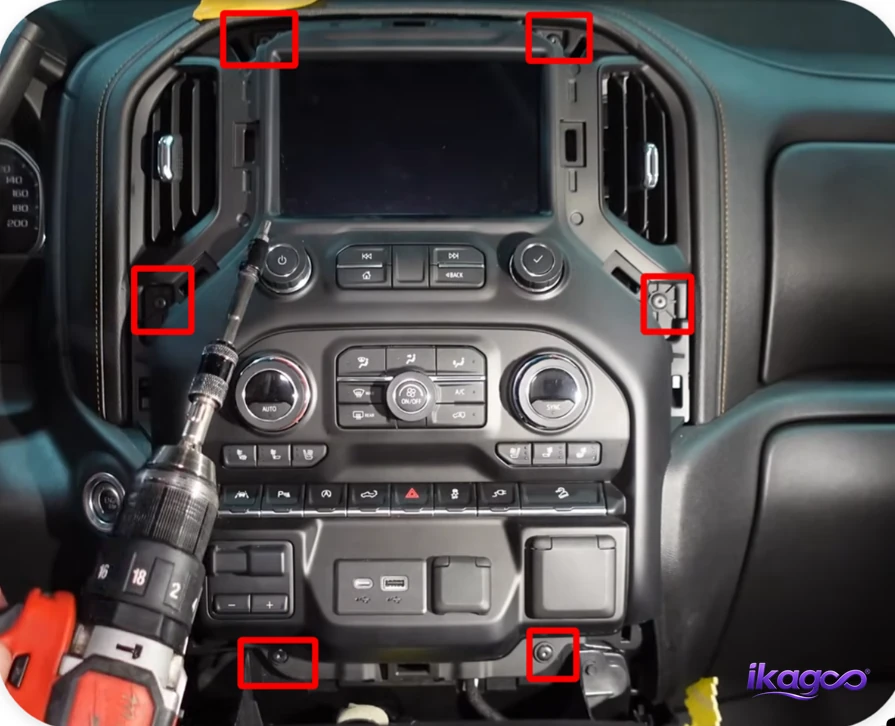
Remove the center-console mounting screws
The original control assembly remains mechanically secured until these screws are removed.
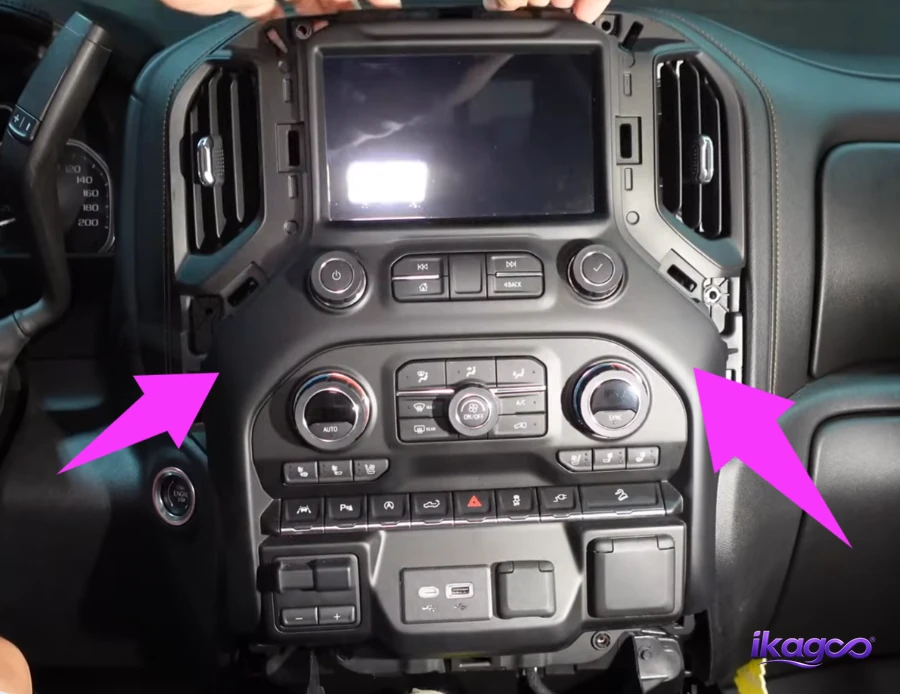
Remove the original center control panel
Support the panel because several original connectors are still attached behind it.
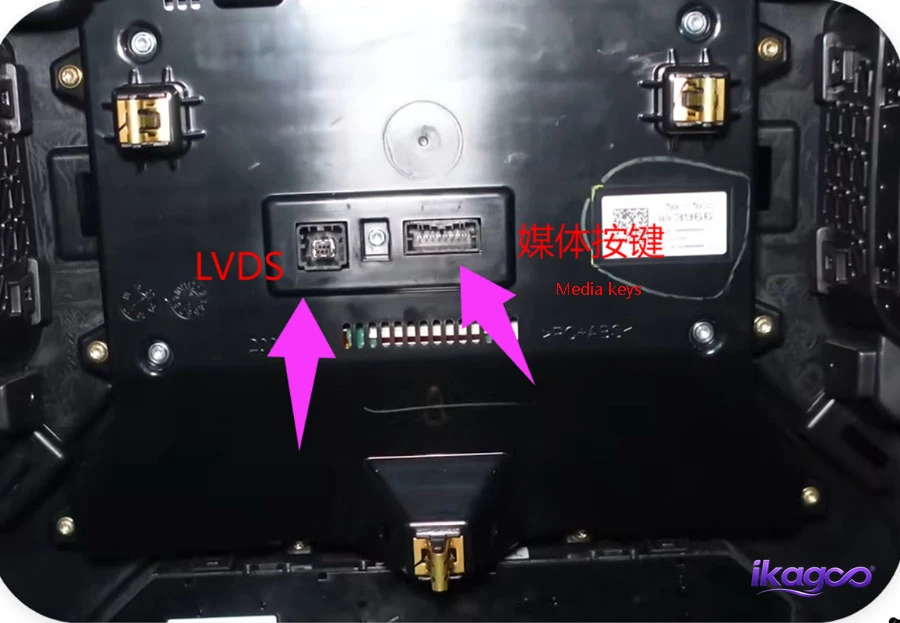
Disconnect the original display LVDS / media-button connection
This is the factory display-data route that will later be integrated with the vertical-screen system.
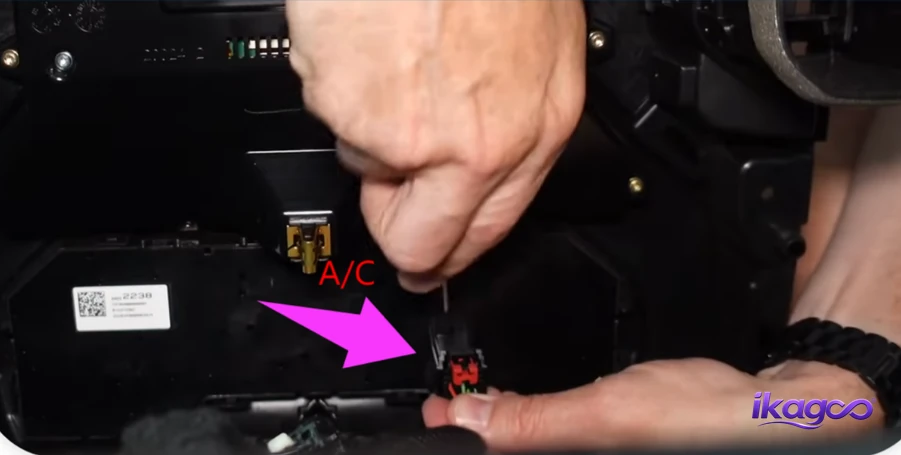
Disconnect the original air-conditioning connector
Release the original climate-control plug from the removed center-control assembly.
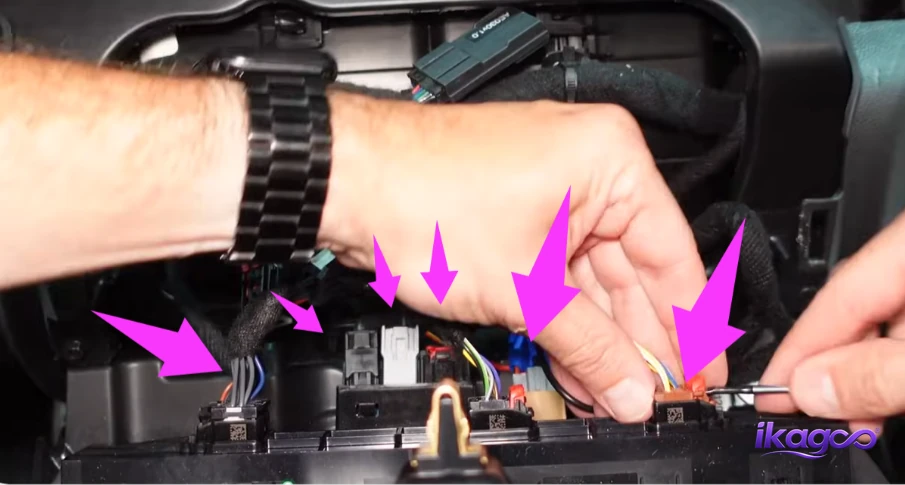
Disconnect the hazard, USB and cigarette-lighter connections
These lower factory connections must be unplugged before the original modules can be transferred.
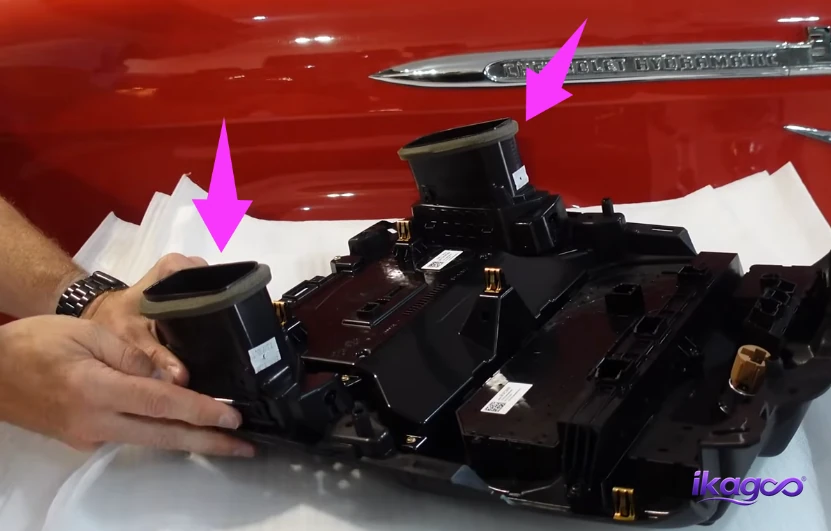
Steps 12–17: move the original Silverado hardware into the new fascia
Remove the original vent, power, cigarette-lighter and USB modules
These factory components are reused instead of being discarded.
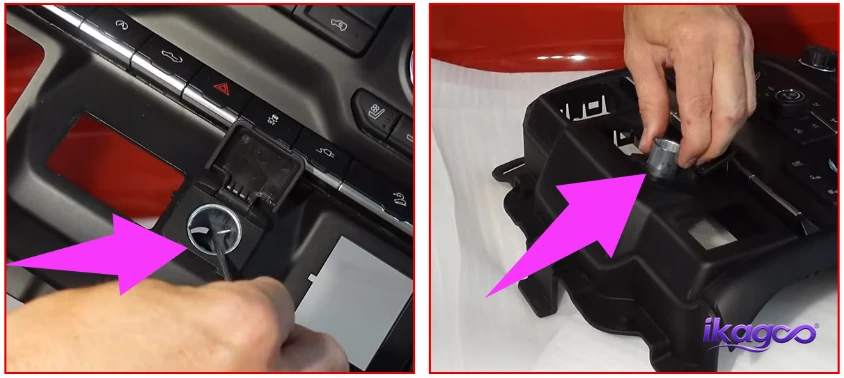
Remove the cigarette-lighter module correctly
The metal outer housing must be released before the internal module is removed.
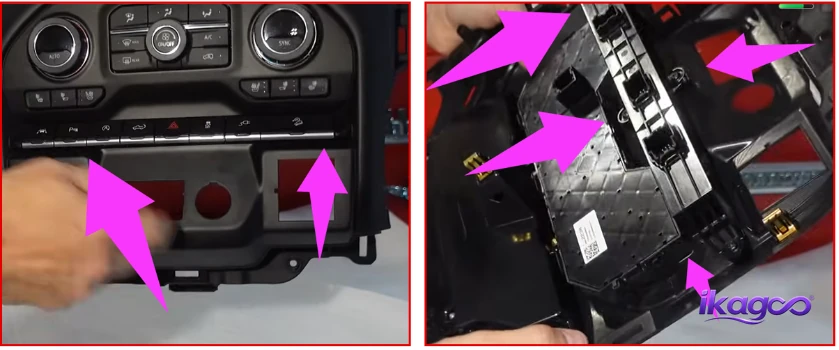
Remove the original switch-button assembly
The factory function buttons are transferred to the bottom of the vertical-screen assembly.
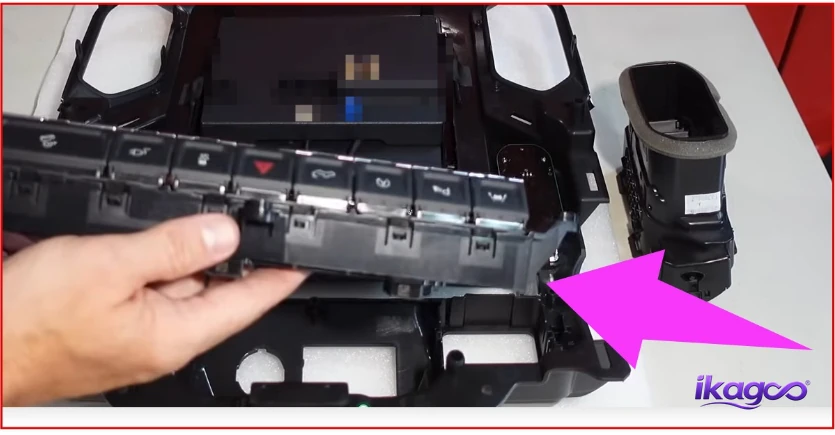
Mount the original vehicle buttons under the vertical screen
Position the factory button module in the corresponding lower opening of the new screen fascia.
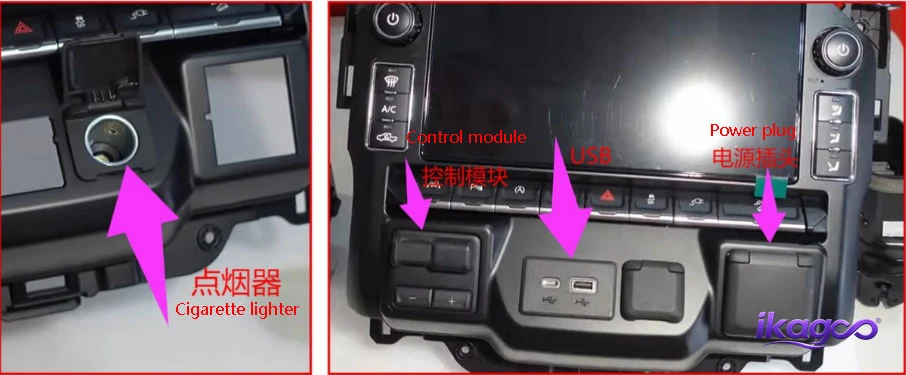
Install the original cigarette-lighter, USB and power modules
Install these retained modules into the new fascia in sequence.
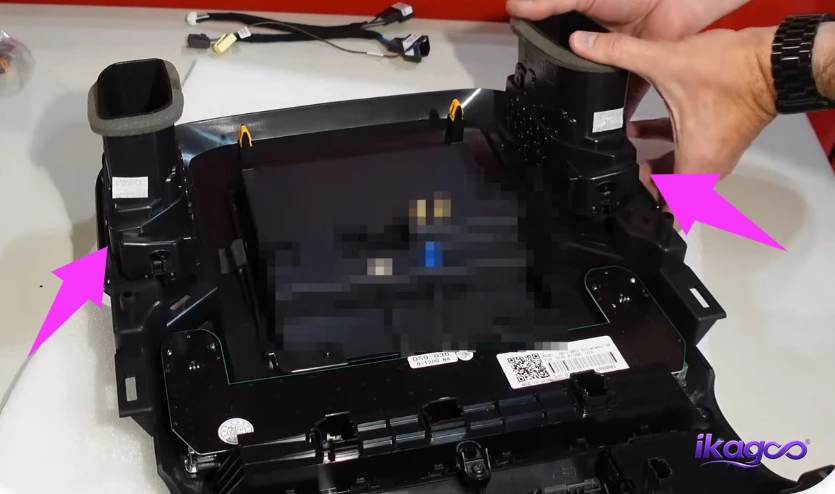
Install the original air vent into the vertical-screen fascia
The original Silverado air vent is moved into the corresponding vent location on the new assembly.
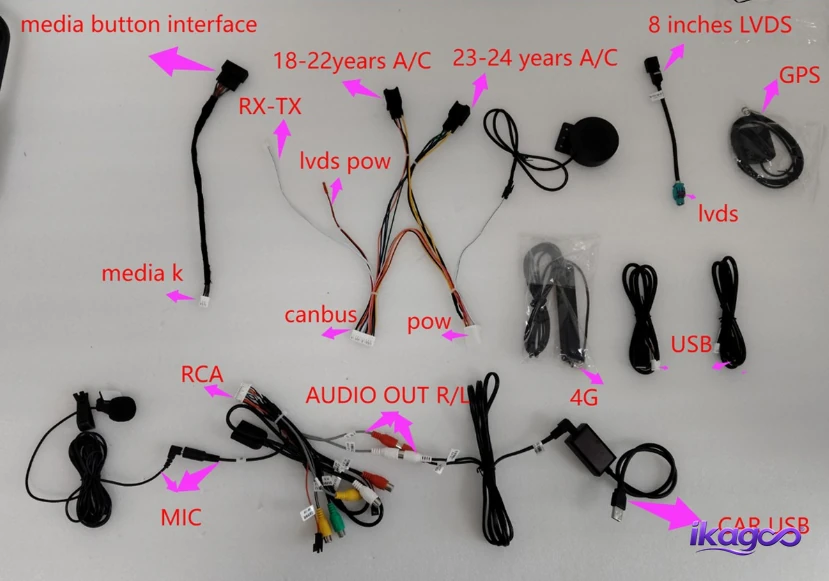
Steps 18–21: identify and connect the vehicle-specific wiring
The photographed wiring route is only applicable when the iKAGOO-supplied harness and interface match your order. If any connector differs, stop and send your order number and connector photos to iKAGOO.
Identify the wiring-definition diagram
Before connecting anything, understand what each supplied connection is intended to connect to.
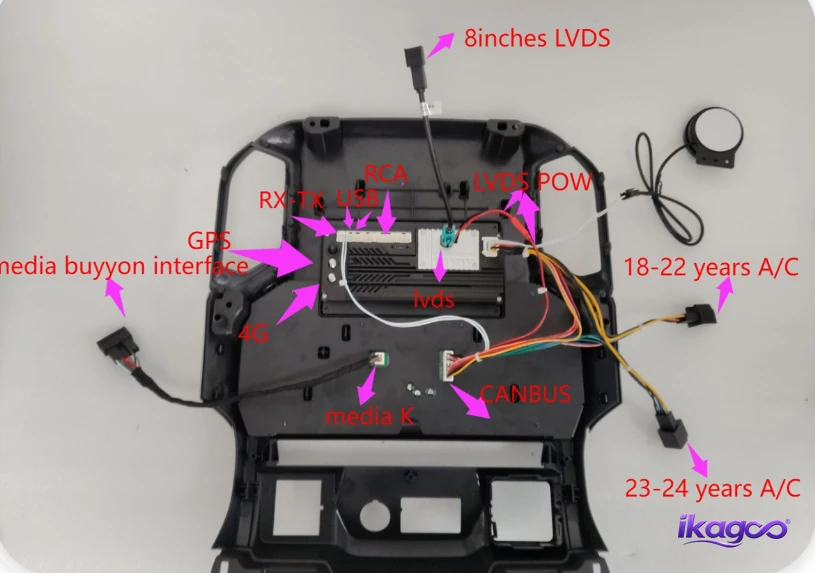
Review the head-unit wiring definition
This diagram covers the main vertical-screen connection side.
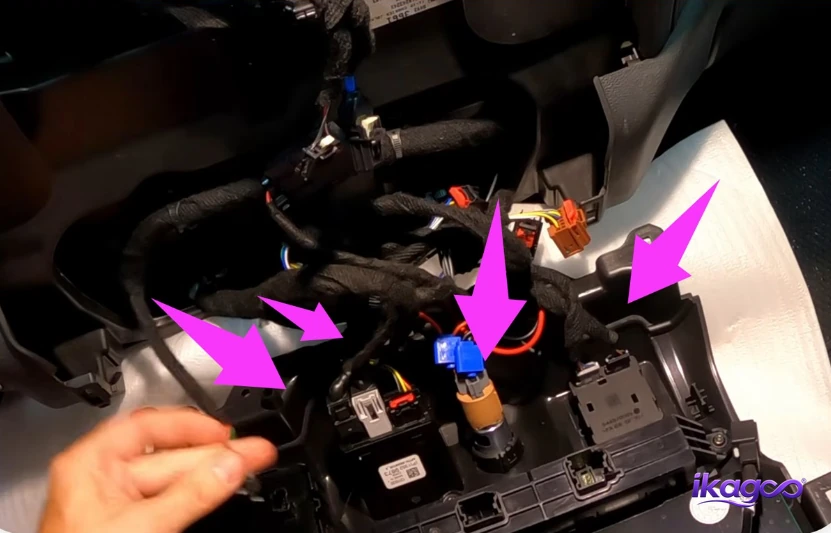
Reconnect the original lower-function connector
The original lower functions disconnected earlier now reconnect through the intended vehicle-specific route.
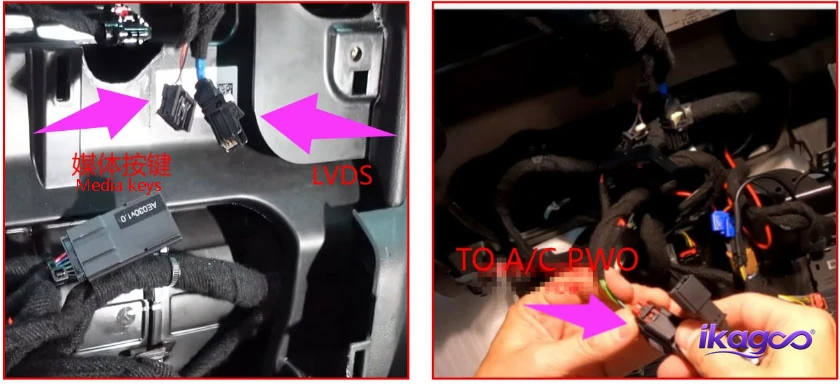
Align the vertical-screen power, LVDS and media connections
These are separate connections and should be identified individually instead of treated as one generic plug.
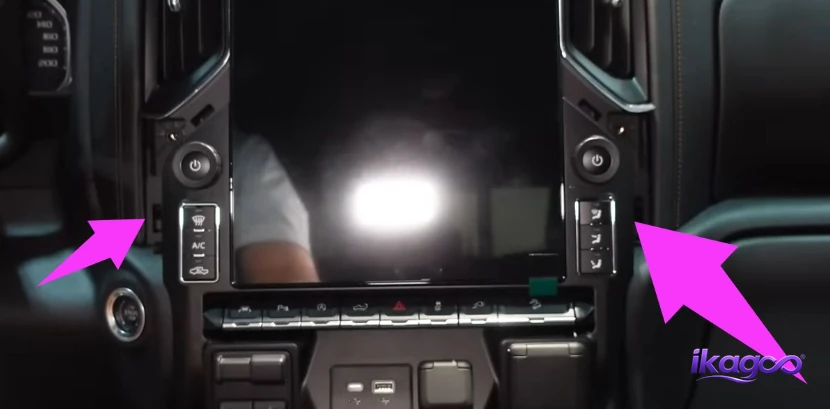
Steps 22–24: mount the screen and complete the audio connection
Place the wired screen into the center console and tighten the screws
Route wiring into open space behind the dashboard before pushing the unit fully into place.
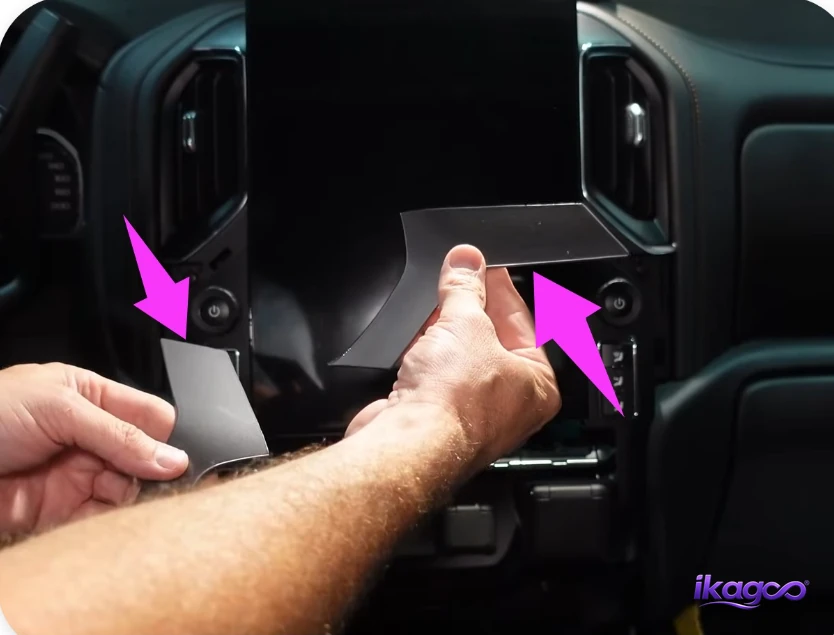
Secure the decorative fascia to the vertical screen
Complete the visible center-stack assembly only after the screen is correctly seated.
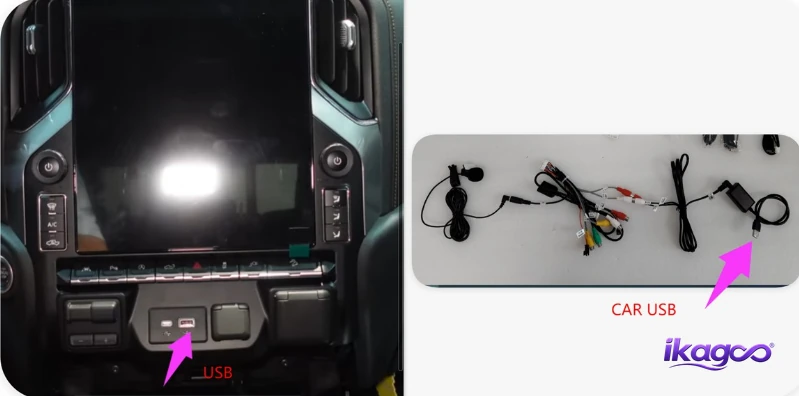
Connect the audio-output AUX route to the original USB port
This is a specific part of this Silverado audio route and should not be hidden inside the general wiring section.
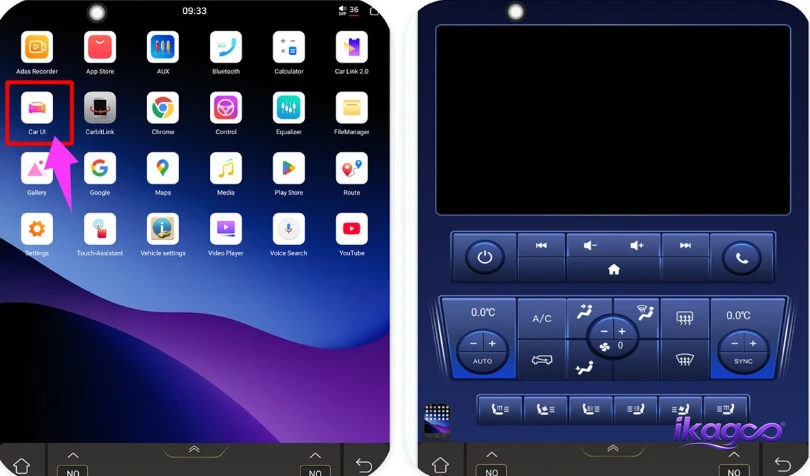
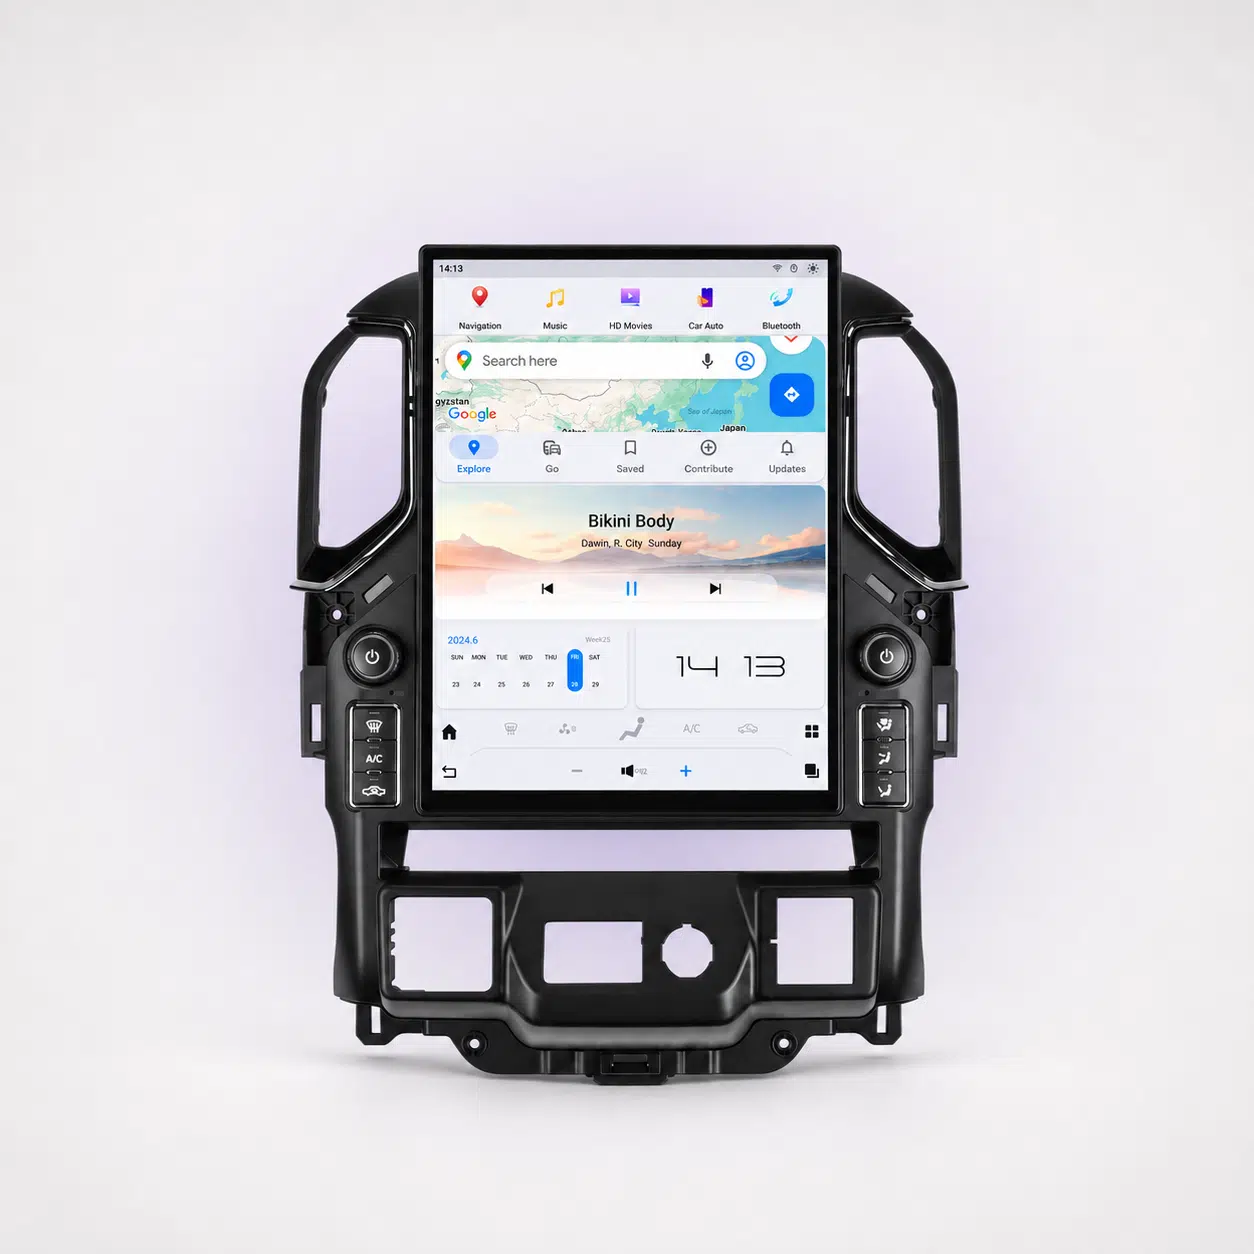
This guide is for the corresponding vehicle-specific iKAGOO product route. Product version, fascia, harness and interface must match the truck configuration confirmed with the order.
Step 25: what if the original Silverado interface displays incorrectly?
The reference sequence does not jump straight to changing settings. It first checks the original LVDS route, then confirms the original vehicle screen size.
Open the vehicle-information display settings only after checking the hardware
If the original vehicle interface looks stretched, incorrectly scaled or abnormal, begin with the display connection.
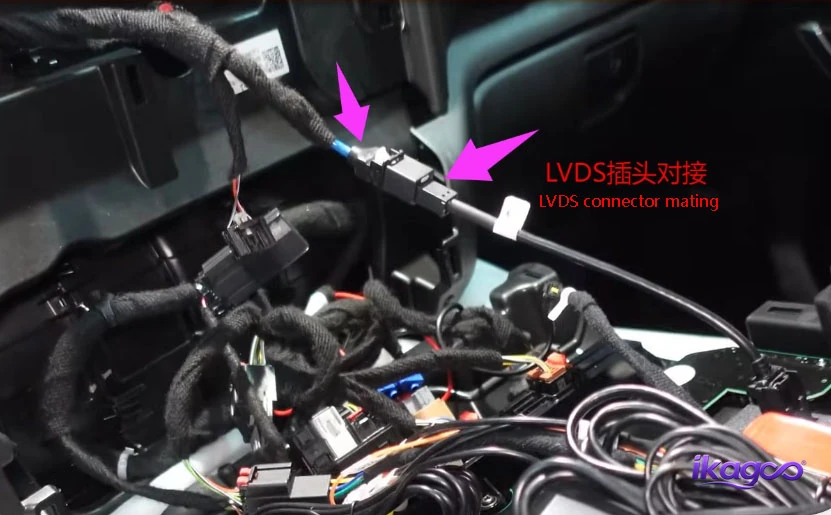
Inspect the original vehicle LVDS connection
A loose original display-data connection can create a display problem that software settings will not fix.
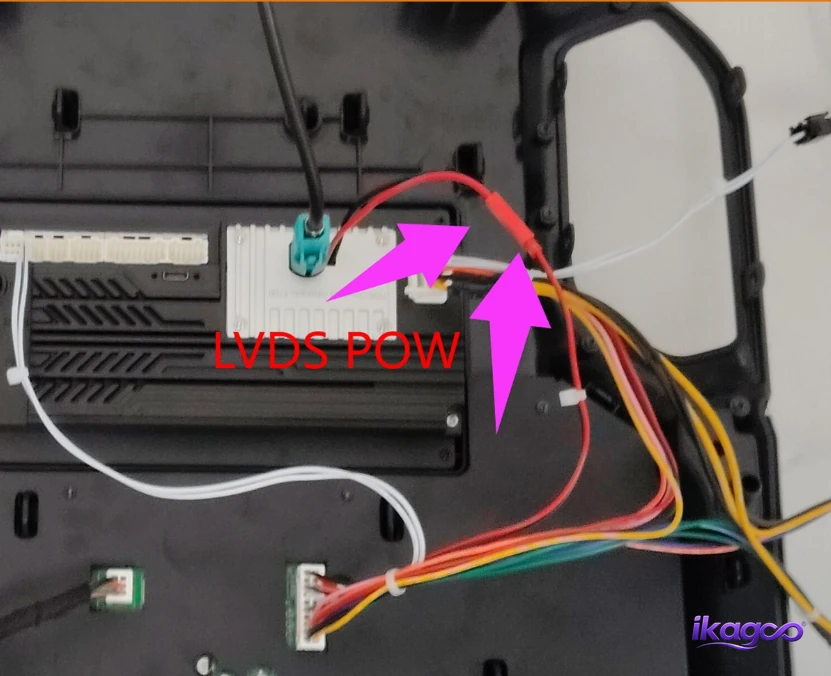
Check the corresponding LVDS / power connection
Verify the second side of the display route before changing the factory-screen size.
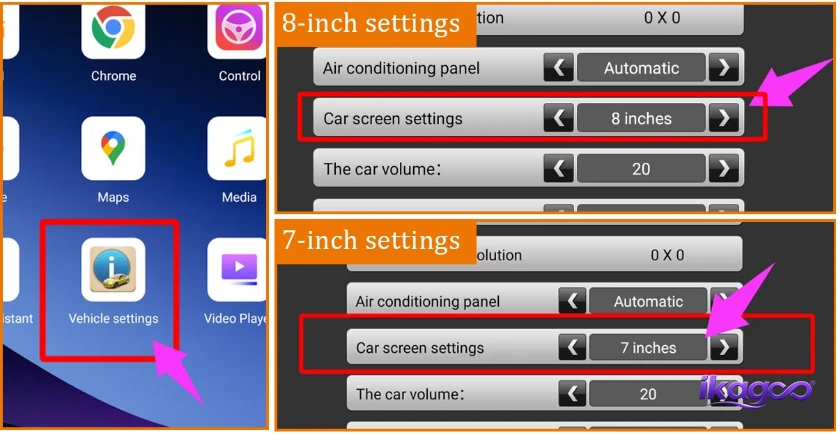
Set the original factory display size to match the truck
The documented Silverado route distinguishes between factory 7-inch and 8-inch displays.
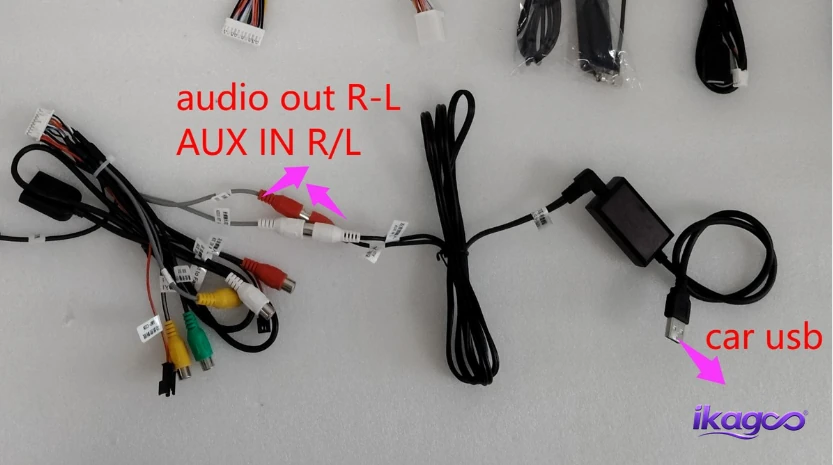
Step 26: how do you switch audio and diagnose no sound?
The original sequence contains three distinct audio checks. They should not be collapsed into one vague “check audio” instruction.
Inspect the audio-output and USB adapter connection
Confirm the audio adapter is correctly connected to the vehicle's original USB route.
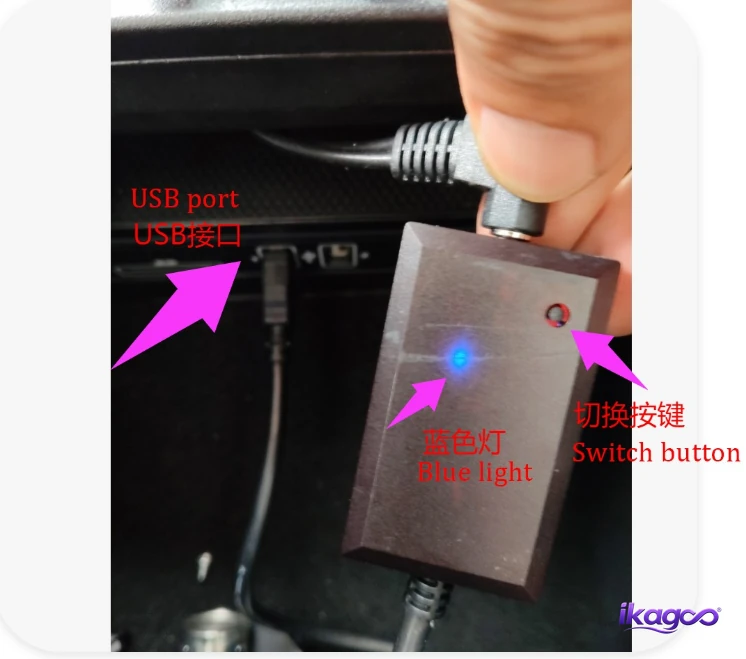
Activate the USB audio converter when your supplied adapter matches this type
The documented adapter uses a physical switch-button procedure.
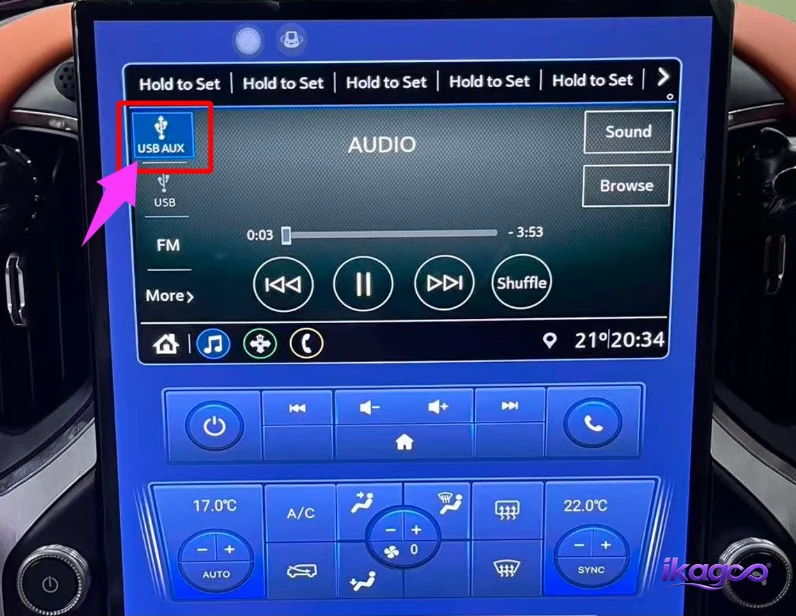
Switch the original vehicle audio source, then test Android playback
The factory audio source must be on the correct USB/AUX route before Android playback is tested.
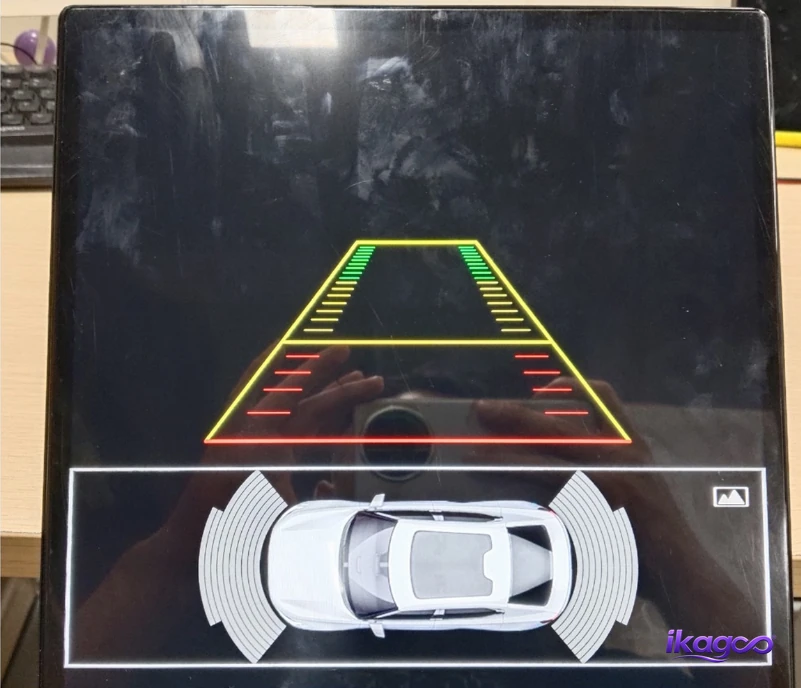
Step 27: what if the original reverse interface does not appear?
Check whether the original reverse screen is missing or Android reverse appears instead
The documented route treats this as a local-reverse configuration issue after the physical camera/interface connections have been checked.
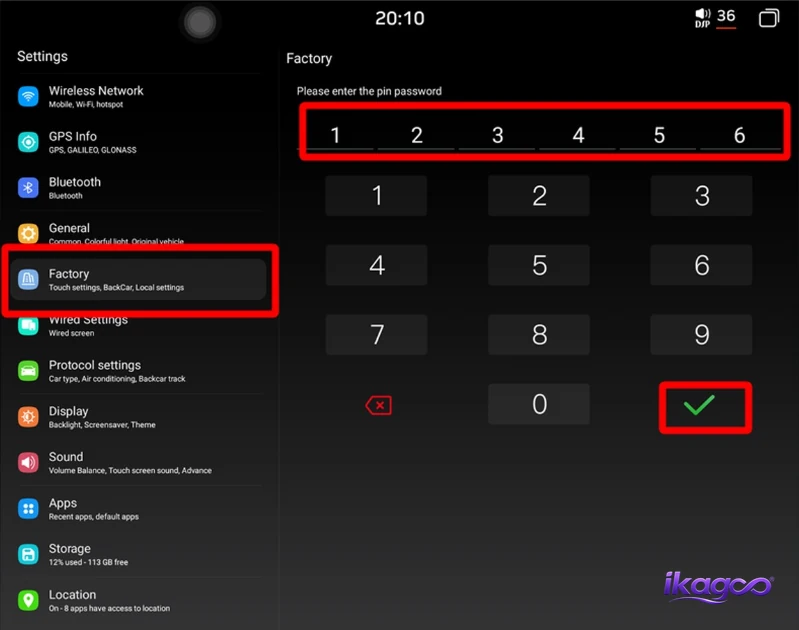
Open the applicable factory-settings menu
The reference installation enters factory settings at this point to check the reverse configuration.
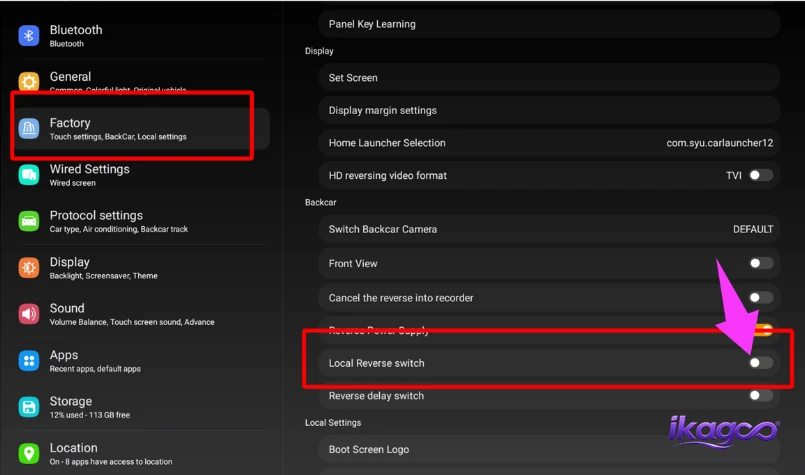
Verify the Local Reverse option for the matched configuration
The documented procedure disables Local Reverse when the retained original reverse interface is required.
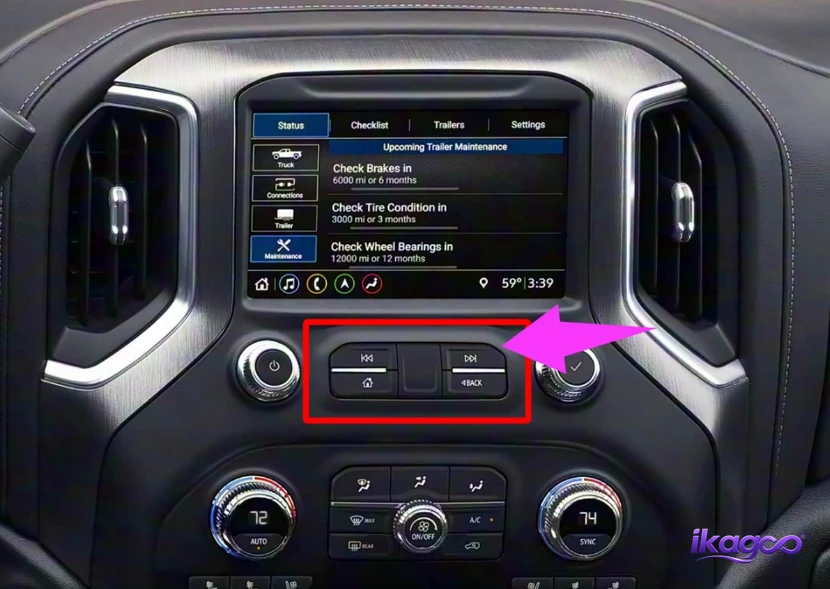
Step 28: configure the original Silverado buttons correctly
The documented installation distinguishes between factory 7-inch and 8-inch configurations because their original control-panel button functions can differ.
Confirm which original display and button layout the truck had
Do not select a panel style only because the replacement screen looks the same.
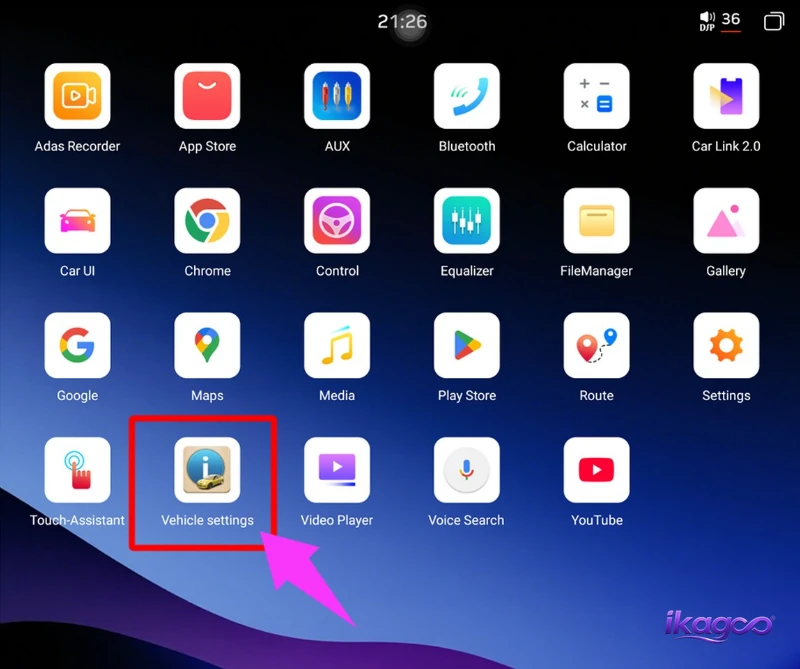
Open Vehicle Information and activate the factory-panel settings function
This is the configuration area used to match the retained original controls.
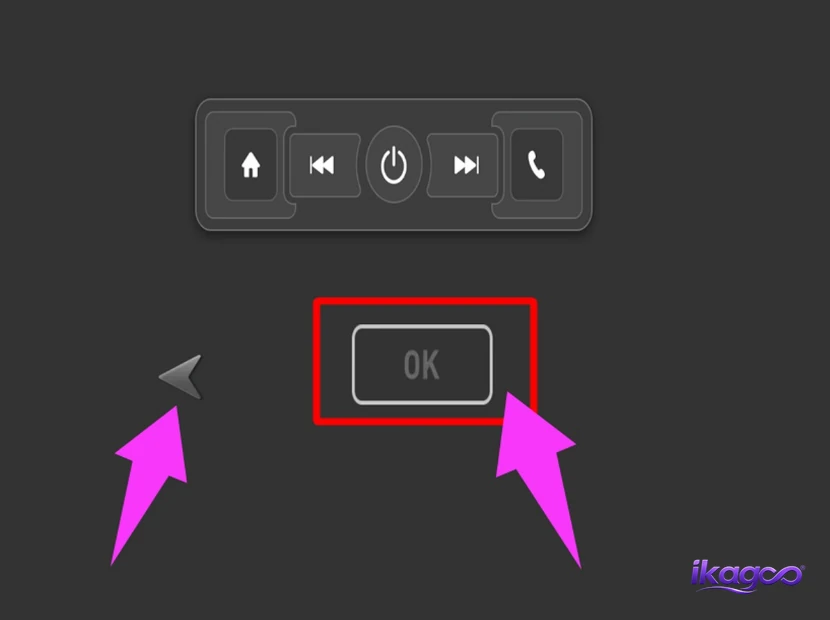
Select the panel style that matches the actual original vehicle buttons
The documented menu provides two panel styles for the two original button arrangements.
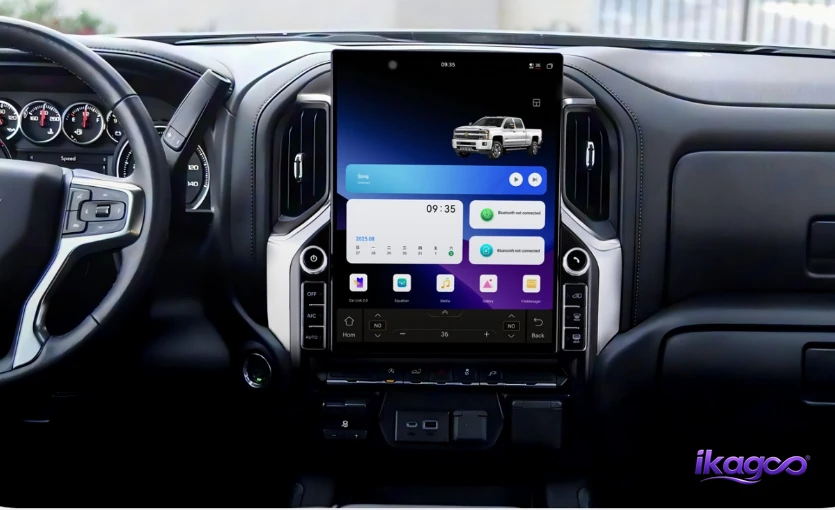
When is the Chevy Silverado Tesla Screen installation complete?
The dashboard should only be fully closed after the physical installation, original vehicle functions and Android functions all pass testing.
Keep the wiring accessible and diagnose the exact failed function first. iKAGOO customers should provide the order number, vehicle details and clear photos/video when requesting version-specific technical support.
This guide is only for the corresponding iKAGOO-supplied hardware
Provide your order number for version-specific wiring confirmation, configuration guidance, applicable firmware support and installation troubleshooting.
iKAGOO cannot verify third-party screens, harness pinouts, CAN interfaces, firmware or hidden parameters. iKAGOO does not accept responsibility for damage caused by applying these instructions to unrelated hardware, third-party wiring, forced connections, cut wiring or modified connectors.
Chevy Silverado Tesla Screen Installation FAQ
What years does this iKAGOO Silverado installation guide cover?
The public iKAGOO guide is scoped to supported 2019–2023 Chevrolet Silverado applications corresponding to the current iKAGOO product range.
Why do I need to confirm whether my original display is 7 inches or 8 inches?
The documented Silverado installation route uses the original display size when configuring the retained factory interface. The original 7-inch and 8-inch arrangements can also use different factory-panel button functions.
Why does the Android screen work but there is no sound?
Check the supplied audio-output-to-USB adapter route first. The adapter must be correctly connected to the required original vehicle USB/audio path and the factory audio source must be switched to the applicable USB/AUX source before Android playback is tested.
What should I do if the original vehicle interface looks stretched?
Inspect the original LVDS connection and corresponding display connection first. If both connections are correct, verify that the configured original display size matches the truck.
What if the factory reverse interface does not appear?
First verify the matched reverse-camera/interface wiring. If the physical connection is correct, check the reverse configuration applicable to your iKAGOO hardware version. Do not copy an unrelated factory password or hidden parameter.
Why do the original physical buttons need configuration?
The original 7-inch and 8-inch Silverado control layouts can use different button functions. The selected factory-panel style should match the actual original button arrangement in the truck.
Can I use these settings on a similar screen purchased elsewhere?
No. Similar external appearance does not prove identical wiring, CAN hardware, firmware or configuration. This installation guide is intended for the corresponding product and harness supplied by iKAGOO.
How do I get exact wiring, factory settings or firmware help?
Provide your iKAGOO order number, vehicle year and requested photos of the original dashboard/connectors. Version-specific support is tied to the exact hardware shipped with the order.
Product and installation support
Technical scope: Chevrolet Silverado vehicle-specific vertical Android-screen installation · iKAGOO public fitment range: 2019–2023 · Covers dashboard disassembly, original module transfer, wiring, AUX-to-USB audio, original 7″/8″ display configuration, reverse-interface setup, factory-panel configuration and final testing. Last reviewed: September 7, 2026.








Add comment